

FNAF: Night at the Dentist Overview
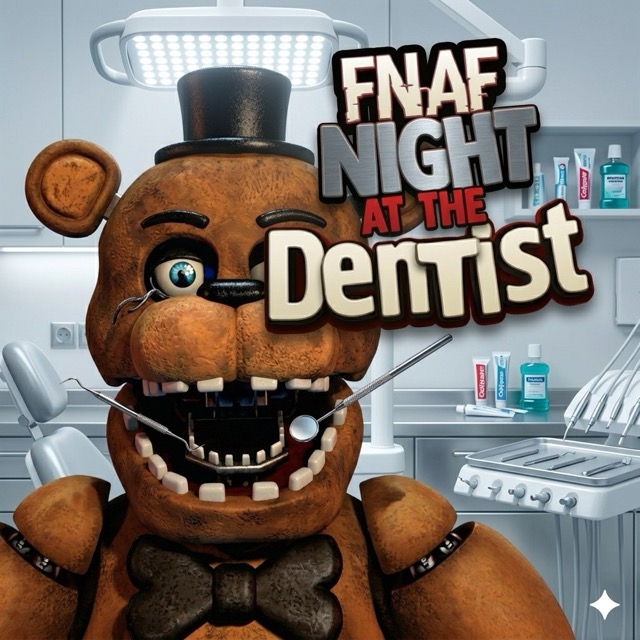
Freddy Fazbear has had an accident involving an electric fence, and the results are not good. His jaw snaps open and closed without control. Wires protrude from the metal frame of his face. Sections of his costume have begun to tear. Before he can return to the stage, someone has to fix him — and that someone is you.
FNAF: Night at the Dentist is a repair and restoration game that inverts the franchise's usual dynamic entirely. You are not running from Freddy. You are not closing doors against him or watching camera feeds to track his position. You are holding dental tools and cleaning instruments, working methodically through a series of repair tasks to restore a damaged animatronic to functional condition. The game's tone is deliberately different from the rest of the FNaF catalog — it's hands-on, tactile, and structured around the satisfaction of fixing things rather than the anxiety of surviving them.
The repair process unfolds in stages. First, cleaning: dirt, dust, and small insects have accumulated between the metal teeth and across the jaw mechanism, and they need to be cleared before structural repairs can begin. Then mechanical restoration: damaged wires need to be reconnected, bent components need to be straightened, and the animatronic structure needs to be stabilized. Finally, costume repair: torn fabric sections need to be stitched closed along marked lines until every rip is sealed. Each stage uses different tools and requires different types of precise interaction, creating a progression that feels genuinely varied across the full repair sequence. It's a game about care and attention — which, in the FNaF universe, is a genuinely unusual thing to be asked to give Freddy Fazbear.
Key Details
- Genre: Casual / Repair Simulation
- Difficulty Level: Easy (tool guidance and visual prompts make each stage accessible)
- Average Play Time: 10–20 minutes per playthrough
- Best For: Players who want a lighthearted FNaF experience without survival horror mechanics, fans of repair and restoration simulation games, and younger players looking for a less frightening entry point to the franchise
How to Play FNAF: Night at the Dentist
Getting Started
1. Begin at the cleaning stage — use the provided scrubbing tools to remove dirt, dust, and insects from Freddy's jaw and between the metal teeth. 2. Follow the on-screen tool icons that indicate which instrument to use at each step — switching to the correct tool before attempting each task is required to make progress. 3. Move to the mechanical repair stage — use the appropriate tools to reconnect loose wires and straighten bent metal components until the animatronic structure is stable. 4. Complete the costume repair stage — use the needle to stitch along the marked dotted lines on torn fabric sections until every rip has been closed. 5. Complete all three stages to finish Freddy's restoration and return him to working condition.
Basic Controls
- Mouse: Select tools from the available set and position them on the work area
- Drag Tools: Apply cleaning instruments, repair tools, and the sewing needle to the appropriate areas of Freddy's jaw and costume
- Follow Hint Icons: On-screen indicators show which tool is required for the current task — match the icon to proceed
Objective: Complete all three stages of Freddy's repair — cleaning, mechanical restoration, and costume stitching — using the correct tools in the correct sequence to restore the animatronic to full working condition.
FNAF: Night at the Dentist Features & Highlights
- Three-stage repair progression — cleaning, mechanical repair, and costume stitching provide a structured sequence of varied tasks that changes the type of interaction at each stage
- Tool guidance system — on-screen hint icons indicate the correct instrument for each task, making the repair process accessible without requiring prior knowledge of the sequence
- Tactile drag-and-apply mechanics — direct tool manipulation through mouse dragging gives the repair process a hands-on feel distinct from other FNaF game formats
- Lighthearted tone within the FNaF universe — a non-horror experience that engages with the franchise's characters from an entirely different angle
- Short, completable sessions — the full repair sequence is achievable in a single sitting, making it well-suited for casual play and immediate satisfaction
FNAF: Night at the Dentist Tips & Strategies
Beginner Tips
- Always check the tool hint icon before applying anything to Freddy's jaw. Using the wrong tool on a section doesn't typically cause permanent damage, but it doesn't make progress either — identifying the correct instrument first makes each stage move more smoothly.
- Work systematically through the cleaning stage rather than scrubbing randomly. Moving the cleaning tool in consistent overlapping strokes across the jaw surface clears the dirt and insects more efficiently than unfocused application in isolated spots.
- For the stitching stage, follow the dotted lines slowly and precisely rather than rushing across them. Accurate stitching that covers the full marked line closes the tear completely — fast but imprecise stitching that misses sections of the line may require a second pass.
Advanced Strategies
- In the mechanical repair stage, identify all visible damage before beginning repairs rather than fixing components as you notice them. Reconnecting a wire before straightening an adjacent bent component that's blocking access may require undoing partial work — assessing the full state of the mechanism first creates a more efficient repair sequence.
- During the insect removal portion of the cleaning stage, look for smaller pests in the corners and crevices of the jaw mechanism rather than only targeting the most visible ones. The stage typically requires clearing all present insects before progress advances — thoroughness early prevents having to go back for ones missed on the initial pass.
- Pay attention to color and texture changes in the work surface as you clean and repair. The visual feedback when an area has been fully treated versus partially treated is the primary signal that a section is complete — developing sensitivity to these visual cues speeds up each stage without requiring guesswork.
What to Watch Out For
- Don't switch away from the tool indicated by the hint icon without completing the current task. Some tasks require sustained application of the same tool across an area before the stage advances — switching to a different instrument mid-task may reset partial progress on that section.
- Don't stitch past the end of the marked dotted lines. The stitching mechanic responds to the marked path — going beyond it doesn't advance the repair and may cause the needle to lose position relative to the guided route, requiring repositioning before continuing.
FNAF: Night at the Dentist Elements Explained
Cleaning Stage: The first repair stage addresses the surface condition of Freddy's damaged jaw. After the electric fence accident, dirt, accumulated dust, and small insects have become lodged between the metal teeth and across the animatronic's jaw mechanism. The cleaning stage provides scrubbing tools and removal instruments designed to clear this contamination systematically. Different tools are used for different types of material — broad scrubbing instruments cover surface dirt efficiently, while more precise tools are required for insect removal from narrow gaps between mechanical components. The stage is complete when all visible contamination has been removed and the surface is clear for the structural repairs that follow. Tool hint icons guide the selection throughout, ensuring players use the appropriate instrument for each specific contamination type.
Mechanical Repair Stage: The second stage addresses the structural damage to Freddy's jaw mechanism itself. Loose wires that have been disconnected from their anchor points need to be reconnected — restoring the electrical pathways required for controlled jaw movement. Bent metal components that are preventing proper mechanical articulation need to be straightened using the correct tools. The combination of electrical and structural repairs makes this the most technically varied stage of the process, with different tool types required for each category of damage. Once all wires are reconnected and all components are straightened, the jaw mechanism is structurally stable — ready for the final stage of restoration.
Costume Repair Stage: The final stage addresses the visible damage to Freddy's costume fabric, which has torn in several places as a result of the accident. The sewing needle is the primary tool for this stage — used to stitch along the dotted lines marked on each tear, closing the rips in the fabric until the costume is whole again. The stitching mechanic requires steady, precise mouse movement along the marked path to complete each seam. Multiple tear locations may need attention, and each requires the same careful stitching process before the stage is complete. When all tears are closed, Freddy's costume is restored to its original presentation, and the full repair sequence is finished — the animatronic is ready to return to the stage.
FNAF: Night at the Dentist Frequently Asked Questions
Q: How do I know which tool to use at each step?
A: On-screen hint icons display the required tool for the current task. Match your selection to the displayed icon before attempting to apply any instrument to Freddy's jaw. Using the wrong tool won't typically cause problems, but it won't advance the repair either — following the hints is the most efficient path through each stage.
Q: What should I do if I can't find all the insects during cleaning?
A: Search the edges and interior corners of the jaw mechanism carefully — smaller insects tend to be positioned in narrow gaps between components rather than in the most visible central areas. Move the removal tool slowly across the full surface of the cleaning area rather than targeting only the most immediately apparent locations.
Q: How do I keep the stitching on the dotted line?
A: Move the mouse slowly and follow the marked path continuously rather than trying to cover distance quickly. Precise, controlled movement along the line is more effective than fast application that drifts from the marked path. If the needle loses position, reposition it at the last accurately completed section of the seam before continuing.
Q: Can I replay the repair after completing it?
A: Yes — the repair sequence can be restarted from the main menu. Replaying allows you to improve the efficiency of your repair process or simply experience the restoration sequence again.
Q: Is this game suitable for younger players?
A: Yes — FNAF: Night at the Dentist is one of the most accessible and age-appropriate games in the FNaF catalog. It contains no horror elements, no jumpscares, and no survival mechanics. The repair simulation format is gentle, guided, and completable, making it well-suited for younger players who are interested in the FNaF characters without the frightening gameplay of the main series.
Games Like FNAF: Night at the Dentist You Might Enjoy
If you like FNAF: Night at the Dentist, you might also enjoy:
- Five Nights at Freddy's - it shares the same animatronic pressure, survival timing, and quick browser play rhythm.
- Five Nights at Freddy's 2 - it shares the same animatronic pressure, survival timing, and quick browser play rhythm.
- Five Nights at Freddy's 3 - it shares the same animatronic pressure, survival timing, and quick browser play rhythm.